Automatic Deployments
Now that we have our AWS dynamic producer running and can start working with temporary credentials, we’re going to automate our deployments. The first thing we’re going to automate is the deployment of our Gateway repository itself! By the time we’re done, our Gateway is going to generate the credentials used in its own management. The overall flow here is very simple:
- The Github Action authenticates to Akeyless using it’s JWT from Github
- The Github Action uses it’s Akeyless access to fetch temporary (STS) credentials with the
adminrole in AWS - The Github Action uses these credentials when running Terraform
- The Action can also configure Akeyless and the Gateway, since we granted this access to anyone with the
adminrole in AWS.
Logging into Akeyless from an Action and fetching AWS credentials is a common workflow, so I’ve gone ahead and wrapped up steps #1-#3 into a Github action for easy consumption. This action will also allow you to fetch other static or dynamic secrets from Akeyless and save them to environment variables/job outputs. However, we won’t need those features in any of the examples here.
Setting up OAuth2 Authentication
We do need to configure an auth method to allow our Github Actions to login to Akeyless. Since we’ll be using our Action’s JWT, we’ll use the OAuth2/JWT auth method. We’re going to automate this process below (so you shouldn’t actually execute the following steps), but I think it will help to understand how to manually setup the auth method:
- Login to Akeyless
- In the left menu go to “Auth Methods” -> “+ New” -> “OAuth 2.0/JWT”.
- Give it a name and a folder, like everything else
- For
JWKS URLenterhttps://token.actions.githubusercontent.com/.well-known/jwks - For
Unique Identifierenterrepository - Check the box that says “Require Subclaim on role association”
- Hit “Save”!
This grants any JWT issued by Github permission to login to our Akeyless account (although we haven’t yet granted access to anything in the account).
NOTE: The unique identifier is used for billing and auditing purposes. Your decision here won’t impact the login process or security. There are actually a variety of possible values you can stick in this input. repository will make sense in 95% of cases, so use that for now and ask Akeyless support for more details if you need it.
Role Attachment
To grant authorization to resources in Akeyless, we need to attach our new github auth method to a role in Akeyless with the desired access! However, we must set a subclaim on this attachment. If we don’t, then literally anyone with a Github account will be able to login to Akeyless and gain access to our resources so long as they know our access id. This is what the “Require subclaim on role association” button in auth methods is for - it makes sure that we don’t forget to restrict access.
You can set subclaim checks against any of the claims that Github specifies in the JWT. You can read about that in their documentation. Here are some example subclaim checks that I might set if I were granting access to Actions running on the clearskies repository:
| subclaim | Result |
|---|---|
repository=cmancone/clearskies |
Any Action from the clearskies repository receives access to the Akeyless role |
repository_owner=cmancone |
Any Action in any of my repositories receive access to the Akeyless role |
repository=cmancone/clearskies ref=refs/heads/main |
Actions from the main branch of the clearskies repository |
Note on the last example: to specify multiple subclaim conditions with the UI, separate them by a newline:
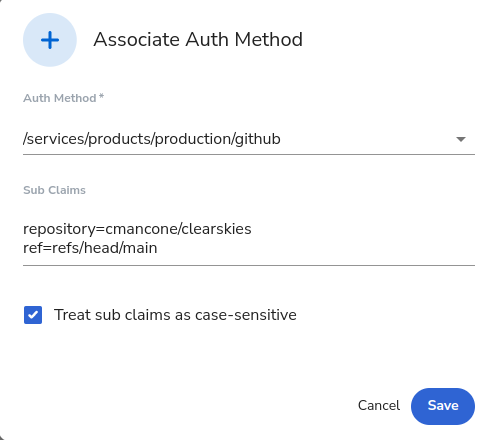
Obviously setting separate permission sets for different branches (e.g. the last example) takes a bit more effort, but it adds a nice security layer since it ensures that your Actions can only affect production if your code first merges into specific branches (i.e. main). In other words, it can enforce the branching permissions inside your repository. Of course, whether or not this step is worth the effort is up to you! In our automatic deployments in this blog, our simple merge strategy requires read-access to production for all branches, so we don’t use branch-specific subclaims.
Automatic Github Access Management
Now that we’ve talked through the basics let’s manage this a bit more automatically. Conveniently, our infrastructure repository is already setup to control Github Authentication for us!
In our terraform.tfvars file there is a variable called repository_access. The variable is a list, and the idea is that each entry in the list grants something in Github access to a role in Akeyless. If I wanted to take the three example subclaim checks from above and grant them access to our environments admin role in Akeyless, I would do this:
repository_access = [
  {
    "sub_claims" : { repository = "cmancone/clearskies" },
    "role_name" : "/services/products/production/admin"
  },
  {
    "sub_claims" : { repository_owner = "cmancone" },
    "role_name" : "/services/products/production/admin"
  },
  {
    "sub_claims" : { repository = "cmancone/clearskies", ref = "refs/heads/main" },
    "role_name" : "/services/products/production/admin"
  }
]
Then just run Terraform, and the repositories are ready to access Akeyless! This creates a new output that returns the corresponding access id for each subclaim.
For the purposes of this example you will want to do this now for the repository you have been using to manage the Gateway. Then, the repository that manages your Gateway will have the permissions it needs to manage itself.
Deployment!
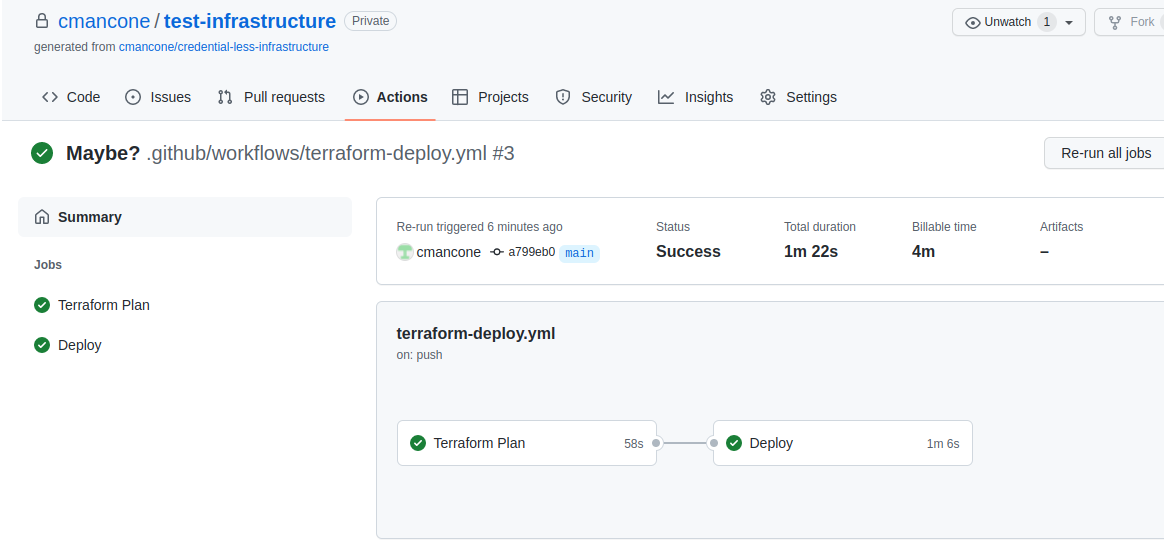
With OAuth2 setup we’re ready to go! In essence, we just need a Workflow that will connect to Akeyless via the Action’s JWT, extract AWS credentials from an Akeyless dynamic producer, and then use those to run Terraform. For this example we’re going to setup our Workflow so that when we are working on the non-default branch, it performs a terraform plan against production to preview what our changes will do. Then, when the code merges into the default branch (i.e. main), it will trigger a terraform deploy and our changes will automatically be deployed. I’ll leave more complicated deployment strategies which utilize development/staging environments as an exercise to the reader :)
Our repository already has a Github Workflow file to do all of this. However, it needs to know our Github access id and the path to our AWS producer to work. Therefore, just open up the .github/workflows/terraform_deploy.yml file and enter these on lines 3 and 4. The access id is our Github access id, which was created in our last step when we set the repository_access variable and received a new output called github_access_id. The producer is the path to our AWS producer that generates admin credentials. We created that in our last blog post and it is also an output from Terraform called aws_producer_name.
When you push to new branches you’ll get a terraform report showing pending changes. Merge to main, and your production environment will be updated. If you want to play around with having different branches deploy to different AWS accounts, then the main change you need is to change aws-producer-path to point to a different AWS producer that issues AWS credentials for the desired account.
AWS Credentials
Application Database