Application/Deployment Overview
Now that we have our basic infrastructure setup - A VPC, Akeyless Gateway, and access management - we can get started on building our application. We’re going to build a simple API endpoint that stores data in an SQL database (in this case, we’ll use an Aurora/MySQL RDS). We’ll also go with a very simple infrastructure - a lambda attached to an application load balancer.
We’ll be creating a new repository for our application and we’ll put everything for our service in a single repository. When we’re done, we’ll have:
- Terraform for the infrastructure (in the
/terraformdirectory) - Code for the application itself (in the
/pythondirectory) - SQL schema definitions for the database (in the
/sqldirectory)
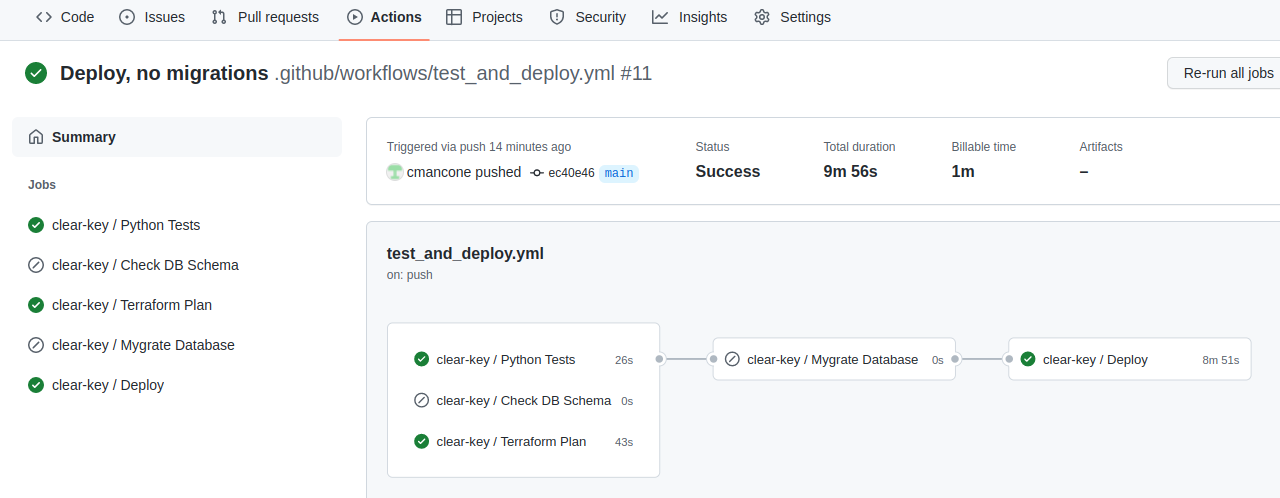
And we’ll automate the full deployment of everything using a simple flow. When running pipelines on non-default branches/merge requests:
- Validate the proposed database schema
- Run the python tests
- Build the deployment package for the lambda
- Validate the terraform
- Generate the terraform plan for deploying the changes against production.
Finally, when changes merge into the default branch, we’ll run these additional steps:
- Run the database migration
- Run terraform and push out our changes
Let’s go!
Here’s the application we’ll be deploying:
https://github.com/cmancone/credential-less-application
Which already has a workflow in place. Therefore, getting started is simple:
- Clone/fork the above repository to a new one of your own.
- Adjust the terraform settings in the
terraform/terraform.tfvarsfile to match your needs. - Copy over the VPC and subnet ids from your shared infrastructure repo (they are available as outputs).
- Set the
Akeyless_access_idto be the one for your Akeyless admin auth method (the same one we used in theterraform.tfvarsfile for our last repo). - Set the folder in Akeyless where all your environment’s resources live (e.g.
/services/products/production). - Enter your Route53 hosted zone name and the domain that you want to host the API endpoints on.
- Enter the domain name to your Akeyless Gateway.
- Enter the security group id for your Akeyless Gateway (so we can grant it network access to the databsae)
- Give your new repository access to Akeyless with the
repository_accessvariable from our Github Auth blog post. - In the workflow file set the path to your AWS producer (e.g.
/services/products/production/aws-admin) - In the workflow file set the Github access id (which comes from the output of the shared repository terraform after adding the new entry to the
repository_accessvariable) - Note that migrations are disabled via an input on the workflow:
run-database-migrations: false - Push to main and watch your infrastructure deploy
Disabling migrations is important because we don’t yet have a database, so we can’t yet run database migrations. After the initial deploy though, we’ll have everything we need, so you can remove the run-database-migrations: false then:
Database!
We’re very close to a fully functional application, but we need to understand our database setup. Terraform will launch an RDS for us and select a random password to use for the master password. It will create an actual database on the system as well, and name it according to the name variable in the terraform.tfvars file (in this example, products). Obviously we want Akeyless to take ownership of the master password, and will have everyone connect to the database via a database dynamic producer. Conceptualy this works in exactly the same way as it did for our AWS producer - our master database credentials go into a target along with the database host name. We then create a dynamic producer that will use these credentials to generate and revoke database users. Finally, we need to deploy a rotator to regularly rotate the master password. Conveniently, when we first create the rotator, Akeyless will immediately rotate our database’s master password for us. Therefore, we don’t have to worry about how Terraform stores the random password it created for us (since that password will be invalid before Terraform even finishes running). However, we do have to tell Terraform to ignore changes to the password. If for some reason we need to know the actual master password later, a user with sufficient access in Akeyless can retrieve it from the database target.
Terraform and Akeyless will work together to do all of this for us automatically! By the time Terraform finishes running we’ll have a fully functional database as well as a ready-to-go strategy for managing database access. In particular, Terraform will create two dynamic producers for us:
- One high-permission producer that generates users with full database access. This will be used by our database migration process.
- One lower-permission producer that generates users with read/write access to the tables. Our applications will use this.
In addition, since these are being created by Terraform, Terraform will also automatically inject the Akeyless path for these producers into our infrastructure. When our infrastructure needs database access, it will fetch the path to the producer out of the environment, login to Akeyless, and retrieve temporary database credentials from the producer.
This accomplishes one of the goals we mentioned from the very beginning: we’ve replaced secrets-in-the-environment with secret-references-in-the-environment. This is safer of course since it negates an entire category of application weaknesses. More importantly though, it simplifies access management. Changes in credentials are inevitable. If those credentials live in the application environment, the only way to update the application is by restarting it. By putting the path to the secret in the application environment (rather than the secret itself), and configuring our application to fetch the actual credentials itself, we can also configure the application to re-fetch the credentials when needed. We’ll see more of this (as well as some additional benefits) later.
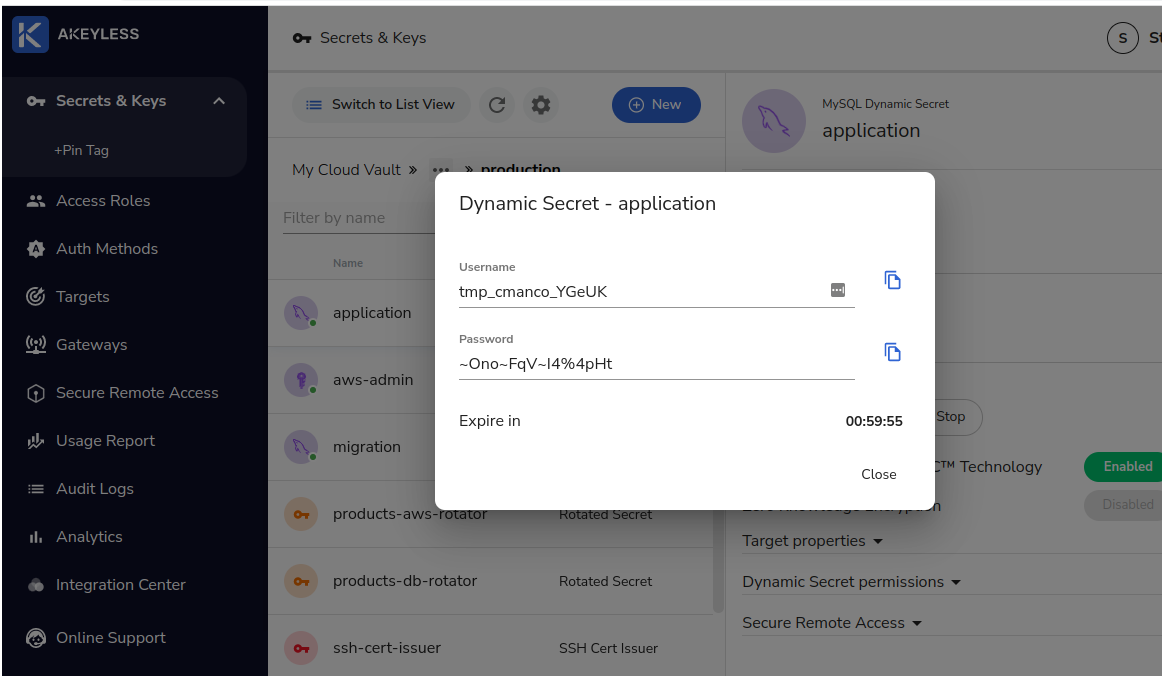
For reference, here’s an example of what the database producers look like from the Akeyless UI:
Automatic Deployments
Migration